Step-by-step guide: How to define a header for a topic in HelpNDoc
HelpNDoc assigns a header when you create a new topic. It is easy to update this header. You can also hide the header if you don’t want it displayed when you publish your documentation.
By default, HelpNDoc assigns the topic name as the topic header. There are three ways to update the topic header:

Option 1
Select the topic for which you’d like to update the header.
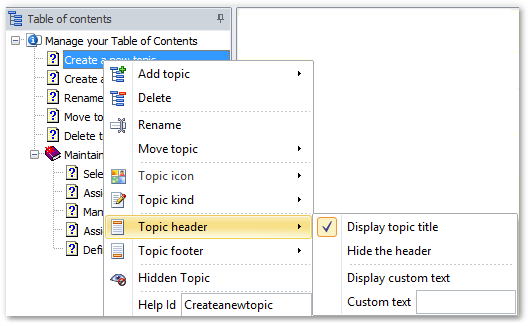
Click Topic properties in the Home ribbon tab to display that menu. Select Topic header.
By default, the topic header is the topic name. To update it, enter the header that you’d like to use in the box labeled, “Custom text”. Then, click Display custom text.
Click Hide the header to prevent the header from being displayed in your documentation.
Option 2
Right-click the topic for which you’d like to update the header. This displays a menu.
Select Topic header to access the menu as outlined above.
Option 3
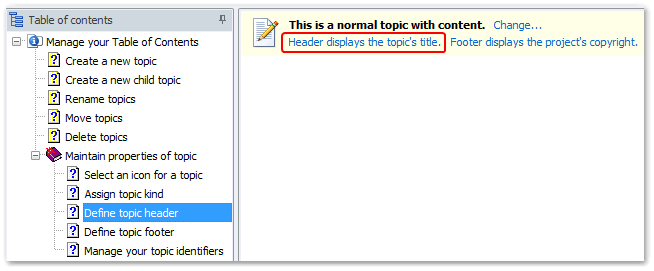
When a topic is selected, the status of the header is displayed in the yellow bar along the top of your page:
- Header displays the topic’s title indicates that the header is the same as the name of the topic
- Header displays a custom title indicates that you’ve defined a header for the topic
- Header is hidden indicates that the header will not be displayed when you publish the documentation
To update the header, you can click its current status. This displays the menu as outlined above.
To return to the default and use the topic name as the topic header, follow any of the steps outlined above and select Display topic title.
See also
- How to define robots.txt and Robots meta tags in your HTML documentation ?
- Custom help topics URL aliases and context sensitive HTML enhancements in HelpNDoc 6.2
- Define default topic properties, Use external HTML code, Export folder contents and more in HelpNDoc 6.1
- Topics status, custom properties, find and replace by library items or RegEx, Spanish translation and more in HelpNDoc 6.0
- How to assign topic kind in HelpNDoc