Step-by-step guide: How to manage your topic identifiers in HelpNDoc
Each topic in HelpNDoc is uniquely identified by an Help ID and an Help Context so that it can easily be referenced from a Web or Windows application.
When you create a new topic, HelpNDoc assigns two identifiers:
- Help ID is an alphanumeric code that uniquely identifies a specific topic in various documentation formats
- Help Context is a numeric index that uniquely identifies a specific CHM topic using the Windows API
Both of these identifiers are mandatory for each topic; neither may contain a space.
Note: By default, the Help ID is automatically updated when the topic caption is changed. To disable this behavior, click “Project options” in the “Home” ribbon tab, then un-check “Always synchronize Help ID with topic caption”.
By default, HelpNDoc assigns the topic name to the Help ID and a system-generated number to the Help Context. To view the identifiers assigned to a topic, you have two options:
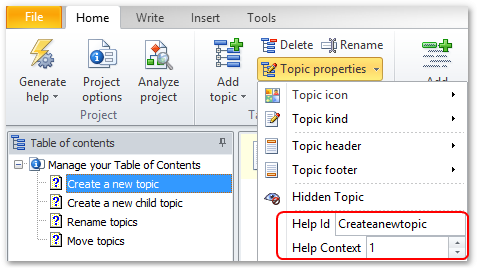
Option 1
Select the topic for which you’d like to view and update the identifiers. Click Topic properties in the Home ribbon tab. This displays a menu with the Help ID and Help Context values.
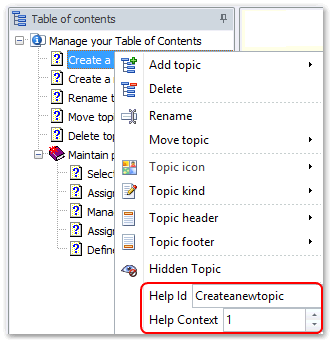
Option 2
Right-click the topic to access the menu as outlined above.
To assign a new Help ID or Help Context number to a topic, enter the new identifier and then press the Enter keyboard shortcut.
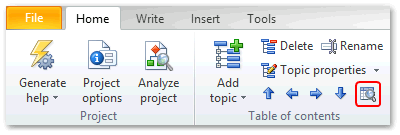
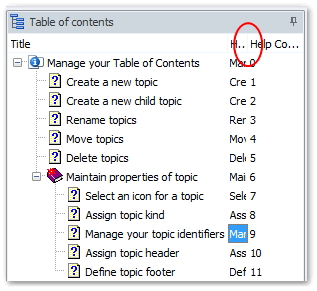
It is possible to view and edit both the Help ID and Help Context properties of all topics in the table of contents by switching to the extended view.
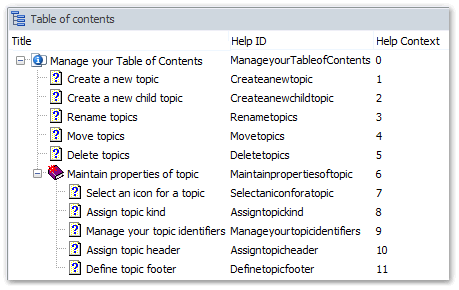
This displays the Help IDs and Help Context for each topic in your table of contents.
To edit the Help ID or Help Context for a topic, double click the cell, make the change and validate with the Enter keyboard shortcut.
To toggle your table of contents back to the compact view, click Switch to compact/extended view in the table of contents section of the Home ribbon tab. This displays only the topic names in your table of contents, expanding your desktop.
Thanks to Help ID and Help Context, developers can link your Windows applications and web pages to specific topics within your documentation. We will see in other guides how to achieve that for various programming languages and web applications.
See also
- How to define robots.txt and Robots meta tags in your HTML documentation ?
- Custom help topics URL aliases and context sensitive HTML enhancements in HelpNDoc 6.2
- Define default topic properties, Use external HTML code, Export folder contents and more in HelpNDoc 6.1
- Topics status, custom properties, find and replace by library items or RegEx, Spanish translation and more in HelpNDoc 6.0
- How to assign topic kind in HelpNDoc