Step-by-step guide: How to publish your documentation
HelpNDoc affords you tremendous flexibility to support dynamic requirements when you publish your documentation. After you’ve completed your documentation, you can publish it in a variety of formats using a range of options.
There are two ways to generate your documentation. You can use ‘Quick generate’ to publish one output at a time. Or, you can use your build list to publish documentation in one or many formats simultaneously.
Option 1: Quick generate
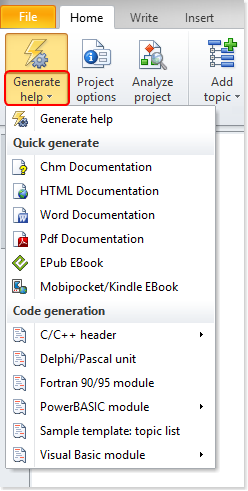
Click the lower half of Generate help in the Home ribbon tab to display a menu of the default publishing options offered by HelpNDoc.
Click the one that you’d like to use to generate your documentation in that format.
Note: If you have not yet defined settings for the format you selected, HelpNDoc will use its defaults settings for that format when generating your documentation.
If you have defined settings for the format you selected, HelpNDoc will apply those settings.
If you have defined settings for two or more outputs of the same format that you selected, HelpNDoc will use the settings of the first instance listed in your build list.
For example, if you defined settings for two CHM outputs, the settings of the one listed first in your build list will be applied when you publish a CHM file using ‘Quick generate.’
Option 2: Generate documentation using your build list
HelpNDoc allows you to define many publishing outputs for every documentation formats. You can access your publishing outputs and their settings in your build list.
There are three steps to generate documentation using your build list.
Step 1
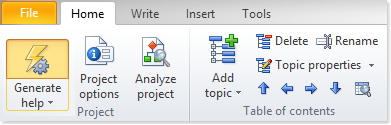
Click the top half of Generate help in the Home ribbon tab.
Step 2
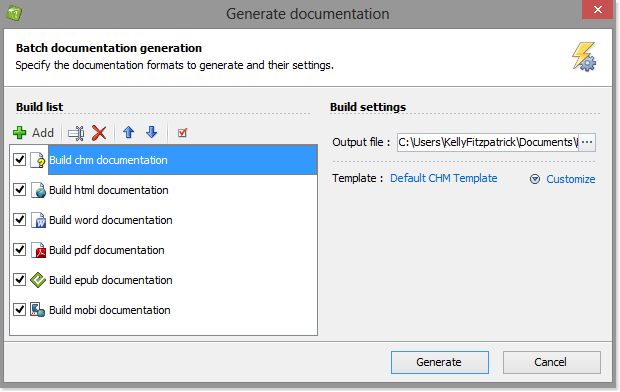
This displays the Generate Documentation window.
Each output and its format is listed along the left-hand side in your build list. The outputs with check marks will be published when you generate the documentation.
To generate these outputs, click Generate in the lower right-hand corner of the window.
This displays a status of each output as it is generated.
Step 3
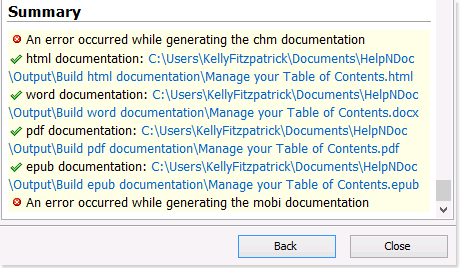
After your outputs have been generated, a summary is displayed. There are two possible outcomes for each output:
- The output was successfully generated: When an output is successfully generated, a link is provided. Click this link to view your documentation in that format.
- An error occurred: When HelpNDoc encounters an error, a warning is displayed. You can browse the log window to learn more about that error and click Back in the lower right-hand corner to return to the Generate Documentation window to fix it.
It is easy to update your build list and manage the settings used to generate documentation. You can add new outputs, assign new names, and reorder your outputs. You can also remove obsolete outputs from your build list. Those will be covered in other step-by-step guides:
- How to create a new documentation output to be published
- How to rename a publishing output in HelpNDoc
- How to reorder your publishing outputs in HelpNDoc
- How to delete a build in HelpNDoc
See also
- New FTP Actions, Improved PDFs, Overridden Library Items, and More in HelpNDoc 9.0
- Empowering Technical Writers: Harnessing HelpNDoc's Override Features for Unlimited Documentation Variations
- How to add a cover image to ePub and Kindle eBooks
- How to change the initial expand or collapse status of the HTML table of contents
- How to create a new documentation output to be published